Ever found yourself leaning into your standing desk, only to be met with a jungle of tangled cables, overflowing USB hubs, and a never-ending scroll of accessories that seem to multiply overnight? I have been there—frustrated, overwhelmed, and questioning whether my sleek workspace was destined to stay chaotic forever. It was that sudden realization, during a late-night work session, that made me understand: my desk needed a serious declutter—and fast.
Why Your Desk’s Clutter Could Be Slowing You Down
Standing desks are fantastic for health, productivity, and overall well-being. But as I layered more accessories—external SSDs, multiple USB-C hubs, sleek laptop sleeves—the space started to resemble a hardware store explosion. Not only did this hamper my workflow, but it also added stress. A cluttered desk isn’t just an eyesore; studies show that disorganization can reduce focus and increase anxiety (Psychology Today).
That was my lightbulb moment: if I wanted to enjoy the full benefits of my standing desk, I needed to control those cables and accessories before they took over. Which led me down the rabbit hole of solutions—specifically, exploring how clamp-on hubs could be game-changers for my 2026 setup.
What We’ll Cover Today
In this post, I’ll share how I successfully streamlined my workspace using three clamp-on hubs, eliminating the cable chaos that used to give me headaches. I’ll also offer practical tips to help you do the same, so you can reclaim your desk and your focus. Because let’s face it—your workspace should work for you, not against you. Ready to tidy up and boost your productivity? Let’s dive in!
Are Clamp-On Hubs Actually Worth the Hype?
One of my early mistakes was trusting generic solutions that promised convenience but delivered clutter. I bought a few inexpensive USB hubs that seemed perfect at first—until they started wobbling, overheating, or losing connection during critical moments. It was a learning experience, but it also made me realize the importance of quality clamp-on hubs designed for stable, organized setups. Once I switched to reliable options, my desk transformed from a tangled mess into a sleek, efficient workspace.
If you’ve faced similar frustration and are tired of the cable spaghetti, stay tuned. I’ll show you how a simple clamp-on hub setup can make a significant difference, saving your workspace and peace of mind. Be sure to check out more tips on innovative laptop accessories that can elevate your productivity and workspace organization. Up next, let’s explore how to choose the right clamp-on hubs to get the cleanest, most efficient setup for your needs.
Identify Your Essential Devices and Cables
Start by taking inventory of all devices connected to your laptop—external SSDs, monitors, chargers, peripherals. During a typical work session, I found myself juggling multiple USB-C cables and adapters, which cluttered my desk and slowed down my workflow. Organize these items on a sheet of paper or digital note, and decide which ones are vital for daily use, helping you focus on what truly matters.
Choose the Right Clamp-On USB-C Hubs
Select hubs that support your required ports—USB-A, HDMI, Ethernet—and offer high power delivery for charging. I researched options like those supporting dual 8K displays (see top USB-C hubs supporting 240W), ensuring no bottleneck in my setup. Pick a model with a sturdy clamp to attach securely onto your desk or monitor edge, preventing wobbling during use.
Attach Hubs Strategically for Accessibility
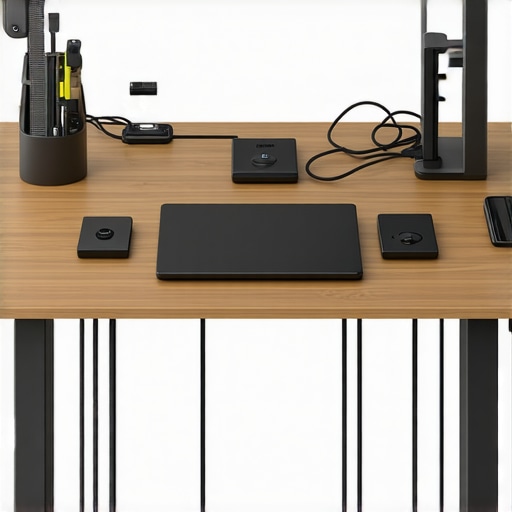
Locate your clamp-on hubs where they’re easily reachable but out of your way—underneath the monitor, to the side, or on the back of your desk. For instance, I attached my primary hub near my monitor’s edge, providing quick access to charging and data ports, while my secondary quieter hub handled less-frequent connections—like my external SSD or backup drives. Proper placement reduces cable clutter and keeps wires out of your path.
Manage Cables with Cable Ties and Sleeves
Bundle cables using Velcro straps or cable sleeves—like the sustainable bamboo sleeves—to keep them neat and prevent tangling. During my last setup, I gathered multiple USB-C and power cables into sleeves, which improved both aesthetics and function. Label cables if necessary, so swapping devices becomes straightforward, saving time and reducing frustration.
Implement External Storage Solutions
External SSDs are crucial but can quickly contribute to chaos. Use rugged models, like those designed for stress—see best external SSDs for 2026—and mount them on dedicated stands or clip-on holders near your hubs, avoiding sprawling wires across the desk. This setup minimizes accidental disconnections and keeps your workspace tidy.
Optimize Your Laptop Setup with a Stand
Elevate your laptop with a sturdy, adjustable stand—like those supporting ergonomic setups—reducing neck strain and creating space underneath for cables. I used a foldable stand (see slim laptop sleeves) and positioned my laptop at eye level, which improved posture and shortened cable runs, making the entire setup more manageable.
Regular Maintenance and Reviews
Periodically reassess your setup. Remove unused cables, upgrade hubs when necessary, and tidy your cable management. During a recent review, I replaced an overheating hub (check out hubs with sensors) with a cooler one, preventing disruptions. Consistent upkeep ensures your workspace remains functional and clutter-free.
Test and Adjust Your Configuration
Finally, test your setup during work sessions—ensure all connections are stable, cables are not strained, and accessibility is optimized. Don’t hesitate to tweak the positions or replace components to suit your workflow better. I found that moving a hub slightly higher or adding a cable sleeve reduced clutter and improved efficiency, reinforcing the importance of active management in workspace organization.
Many tech enthusiasts believe that all laptop accessories are created equal, leading to costly mistakes and subpar setups. One widespread misconception is that cheaper external SSDs are just as reliable as premium models. In reality, budget drives often lack proper thermal management, leading to overheating during intensive tasks (see the SSD overheating guide), which can cause slowdowns or data loss. Moreover, many assume that all laptop sleeves provide similar protection, but materials and build quality vary significantly. Some thin sleeves may look sleek but offer minimal shock absorption, risking damage during accidental drops. Check out top laptop sleeves of 2025 for safer options. When choosing a USB-C hub, there’s a common belief that more ports mean better utility. However, stacking multiple hubs can lead to voltage drops and unstable connections, especially with high-power devices like external drives or monitors. Picking a certified, high-quality hub designed for optimal power distribution—like those supporting 240W—can prevent many issues (see how to choose the right hub). Additionally, many think that all laptop stands are merely aesthetic. But in reality, poor ergonomic design can exacerbate neck strain or reduce airflow, causing thermal throttling. Investing in stands with adjustable height and tilt can improve posture and cooling, boosting productivity. For example, these stands can make a difference. Make sure your accessories align with your workflow needs rather than following marketing hype blindly. Remember, every piece—from external SSDs to laptop sleeves—has nuances that impact performance and longevity. Do you rely on any misconceptions when selecting accessories? Let me know in the comments!
After investing in quality accessories like external SSDs, laptop sleeves, and USB-C hubs, ensuring their longevity becomes a top priority. Regular maintenance isn’t just about cleaning; it’s about employing the right tools and strategies to keep your setup performing at peak levels over time. I personally rely on specific software and hardware routines that have proven effective in my experience, and I recommend you do the same to avoid costly replacements or performance dips.
How do I maintain my accessories and tools over time?
One of my go-to routines is using dedicated cleaning kits designed for tech gear—such as microfiber cloths, compressed air, and electronic-safe cleaning solutions. For external SSDs and laptop sleeves, I prefer gentle wipe-downs every few weeks to prevent dust buildup and dirt intrusion, especially if I carry them around frequently. For more stubborn grime, I’ve found that a mixture of 70% isopropyl alcohol applied with a soft cloth works wonders without damaging sensitive surfaces.
On the software side, regularly updating device drivers and firmware via the manufacturer’s official tools ensures compatibility and smooth operation, especially for complex hubs and external storage devices. I use the dedicated utility from my USB-C hub manufacturer, which monitors port performance and alerts me about potential overheating or connection issues, aligning with best practices outlined in USB hub thermal management guides.
Long-term results depend heavily on consistent care. I also perform periodic backups of data stored on external SSDs using reliable backup software, minimizing the risk of data loss. Additionally, inspecting and replacing worn cables or worn-out sleeves prevents unexpected failures during critical tasks. Investing in high-quality tools like sturdy, titanium cable organizers helps me keep everything neat and functional.
Future trends for maintenance and tools
Looking ahead, I believe that smart, AI-powered maintenance tools will become standard, automatically detecting wear and tear and scheduling alerts or repairs. For example, future USB-C hubs might integrate sensors that relay real-time thermal data to your device, helping you proactively manage overheating issues before they impact performance. As these technologies evolve, staying current and adopting automated solutions will be essential for power users.
To get the most out of your accessories, I strongly encourage you to experiment with advanced cable management techniques, such as using magnetic hubs combined with external temperature sensors. These strategies can significantly extend the lifespan of your gear and ensure consistent performance. For instance, try integrating a liquid-proof sleeve paired with smart cable clips for added durability and organization. Small investments in proper maintenance routines can save you from costly replacements and keep your setup running seamlessly for years to come.
Insights That Changed My Approach to Laptop Accessories
One of the most eye-opening lessons I learned is that quality always trumps quantity. Cheap external SSDs might seem appealing upfront, but their thermal issues and slow transfer speeds can derail your workflow, especially during demanding tasks like 4K editing. I realized investing in rugged and well-designed external drives saved me time and stress in the long run. Additionally, I discovered that even the sleekest laptop sleeves won’t do much good if they lack shock absorption; a robust case saved my device from a nasty drop, underscoring the importance of choosing protective gear over aesthetics alone. My experience also taught me that overloading a USB-C hub with multiple ports can lead to inconsistent connections and overheating, proof that moderation and analyzing actual needs matter more than marketing claims of ‘more ports equals better.’ These lessons have fundamentally shifted my perspective on selecting and maintaining laptop accessories, making me a more mindful tech user.
Tools That Keep My Setup Running Smoothly
To maintain peak performance and organization, I rely on a curated set of accessories that I trust deeply. For instance, I swear by magnetic USB-C hubs, which stay securely attached even during vigorous use—check out these magnetic hubs. For cable management, I use braided, high-durability sleeve protectors that prevent wear and tear—see my favorite cable organizers. When it comes to external SSDs, I prefer models with integrated heat sinks that keep temperatures low even during prolonged data transfers. The key is to choose tools that have been tested under real-world conditions, like the rugged SSDs I recommend for outdoor work, which I found through reliable stress-testing. These tools form the backbone of my setup, allowing me to work efficiently without constantly fixing or replacing accessories.
Embracing Change and Staying Dedicated
Organizing a cluttered workspace isn’t a one-and-done task—it’s an ongoing journey. I encourage you to regularly review your accessories, replace outdated gear, and experiment with newer, smarter solutions like adaptive cable clips or wireless charging stands. Remember, your setup should evolve with your needs, not remain static. Taking small, deliberate actions—like upgrading a hub to support higher power delivery or switching to a laptop stand with better ergonomics—can lead to significant improvements over time. The key is to remain curious, proactive, and committed to creating a workspace that fosters productivity and well-being. By integrating these insights and tools, you’re well on your way to turning your desk into a true sanctuary of efficiency and comfort.
I’ve struggled with desk clutter for years, and I totally relate to the chaos that can ensue with multiple USB hubs and cables. What really helped me was investing in quality clamp-on hubs that are sturdy and support high power output — it made a noticeable difference in cable management and stability. I also started labeling my cables and using color-coded sleeves, which dramatically reduced my setup time and frustration. The key I found is placement—keeping these hubs within easy reach but out of the way to maximize accessibility without sacrificing tidiness. Has anyone here experimented with wireless charging or docking stations as alternatives? I’ve been contemplating those options to further minimize cable clutter. It seems like combining good physical cable management with smart tech solutions could really transform the workspace into something not just functional but also enjoyable to work in.